Where and How to use Loree's in-build accessibility checker?
This article provides guidance on using Loree's accessibility checker effectively. Learn where and how to access its features, ensuring your content meets accessibility standards and promotes inclusivity.
Accessibility CheckerThe Accessibility Checker feature is provided inside Loree Editor to check if there are any accessibility issues on the page, once the page is created. It checks the HTML and highlights the elements with the error and description.
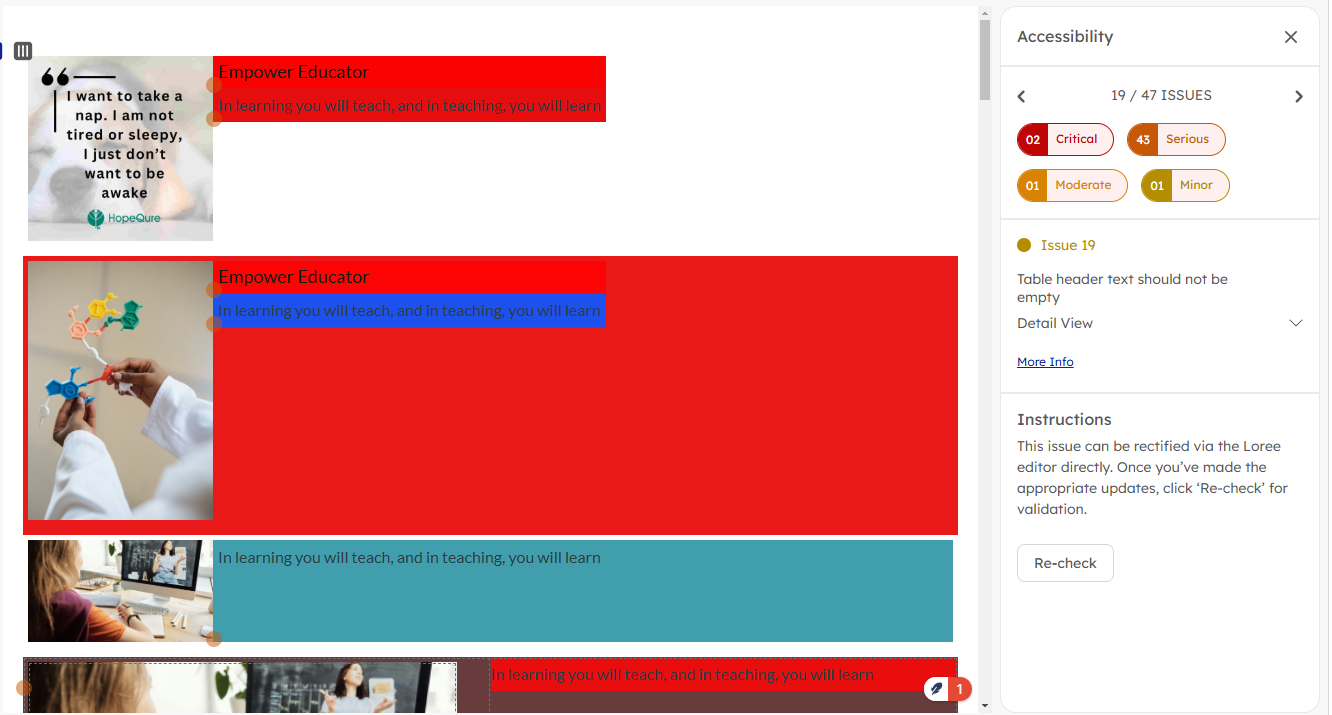
Accessibility Checker is working based on the WCAG guideline Loree Accessibility Checker following Level AA rulesNow, we can see that the Accessibility Checker feature displays the total number of accessibility issues like a notification on the accessibility icon when we click on the save to LMS option. Click on the Check Accessibility button in the top right corner; it will show the list of improvements that need to be done for the template. This allows the user to go through all the discovered issues and fix them without leaving the accessibility checker, and it also provides some quick fixes in the accessibility tray itself.

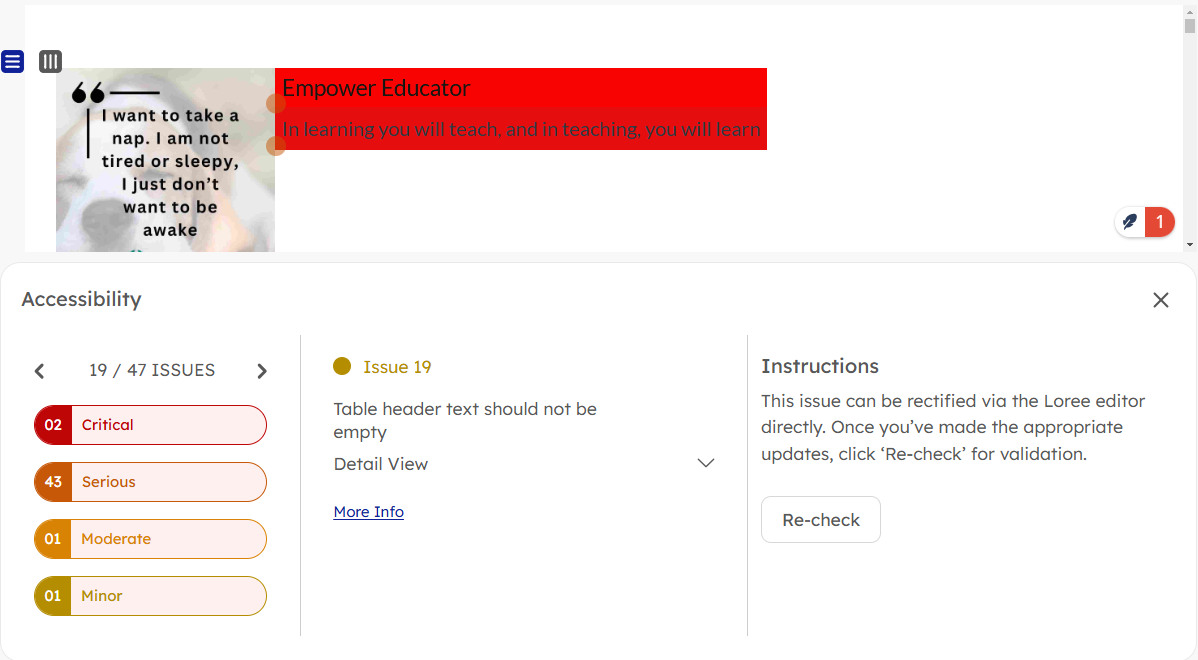
The accessibility checker tray will be responsive based on the device of the user. For large resolution screens like Desktop and Laptops, the Accessibility checker will open on the right side section of the screen, and for small screen resolutions like Tablet, Mobile, the Accessibility checker will be at the bottom of the editor and will also have a separate scroll bar in the checker.


The accessibility checker tray includes an arrow key for navigation and indicates issue severity levels: Critical, Serious, Moderate, and Minor, helping users prioritize fixes accordingly.
Quick fix :
The accessibility checker have the details of the issues and an option to fix them as a quick fix in the checker itself. We can also click on the colored dot in the editor to move to that particular issue. Once the issue is fixed, the severity color tagged in the editor will be removed. We can update the quick fix and click on the apply button to make the required changes. There is also a re-check button on the checker to check for the issues again without going back to the editor.

When you are working on a particular issue, it will be shown in a colored box based on the severity of the Loree editor, as marked below:

 If there are any issues that cannot be fixed as a quick fix in the accessibility checker, those issues can be fixed in the Loree editor directly and the instructions to fix the issue will be provided in the accessibility checker tray.
If the page content has no accessibility issues, it will show the below message:

Thank You
The Accessibility Checker feature is provided inside Loree Editor to check if there are any accessibility issues on the page, once the page is created. It checks the HTML and highlights the elements with the error and description.
The accessibility checker tray includes an arrow key for navigation and indicates issue severity levels: Critical, Serious, Moderate, and Minor, helping users prioritize fixes accordingly.
Quick fix :
The accessibility checker have the details of the issues and an option to fix them as a quick fix in the checker itself. We can also click on the colored dot in the editor to move to that particular issue. Once the issue is fixed, the severity color tagged in the editor will be removed. We can update the quick fix and click on the apply button to make the required changes. There is also a re-check button on the checker to check for the issues again without going back to the editor.

Related Articles
Accessibility Checker
The Accessibility Checker feature is provided inside Loree Editor to check if there are any accessibility issues on the page, once the page is created. It checks the HTML and highlights the elements with the error and description. Accessibility ...How do I check for accessibility?
Learn the use of our Accessibility Checker here. Accessibility Checker The Accessibility Checker option is provided inside Loree Editor to check if there are any accessibility issues on the page, once the page is created. It checks the HTML and ...How to use modules in Loree?
Simplified Editing and Module Management with Loree in Canvas Create Modules To create new modules for your Canvas courses in Loree, you don't need to go back to Canvas itself. Simply open Loree from the left hand navigation in the Canvas Course ...Loree - Frequently Asked Questions (FAQ)
Answers to Your Most Common Queries! Is Loree an LTI? Absolutely! Loree has been developed following the guidelines and specifications of LTI 1.3. Which Learning Management System (LMS) is Loree available for? Loree is accessible to all customers ...Release notes for Loree A2501.3
Published on: 01/03/2025 New Look, Who's This? Loree Reimagined! We're thrilled to unveil a completely redesigned Loree experience! These release notes will walk you through the key changes, showing you before-and-after comparisons so you can easily ...